absolutely loving my life

  • Subscribe to our RSS feed.
  • Twitter
  • StumbleUpon
  • Reddit
  • Facebook
  • Digg
Showing posts with label DIY. Show all posts

Thursday, 24 July 2014

DIY Flower Lamp Shade

Posted on 08:14 by clark

This week I've been sharing projects that I completed for our guestroom last summer.  I’m finishing off this week’s blog posts with a lamp shade project.  I think I originally saw a lampshade project like this on Pinterest and was inspired to make my own.  While this project is easy and inexpensive, it is time-consuming.  It’s a lot like the Coffee Filter Lamp Shade I made.  I recommend watching a television series on Netflix while working on this project to help the time pass;)


To start this project, I bought a yard of white linen at the fabric store and cut/tore it into one inch strips.


Then I started rolling the fabric around my fingers….


….until I had something that looked like this.


Then I loosened the fabric until it looked like a flower


Lastly, I hot glued each individual flower to the lampshade I found at Goodwill.


I strategically placed each flower around the shade making sure the shade looked full but not crowed.

And a few hours later, I had a lamp shade that looked like this.  I'm pleased with the outcome of this project.  I think the lamp is beautiful when it's turned on. The lamp and shade were from Goodwill, costing around $5 before the project.  After purchasing fabric and a package of hot glue, the cost of the finished lamp was around $10.


To see more of the projects for the guestroom, click the following links:

Painting a Horizontal Striped Wall
No Sew Napkin Pillows
DIY Beaded Lamp Shades
Toilet Paper Tubes Turned into Art
More TP Art
DIY “Book” Shelves
DIY Vintage Insect Wall Art
Upcycled Coffee Bar

Read More
Posted in DIY, fabric, flowers, lamp shade, projects | No comments

Wednesday, 23 July 2014

Upcycled Coffee Bar

Posted on 05:18 by clark

What do you do when you see an old microwave stand out in the neighbor’s garbage?  Well, if you’re me, you have your husband go get it, so you can re-purpose it as something else. 

I wasn't sure what I was going to use the old microwave stand for right way, but eventually an idea came to me.  I decided to use it in our guestroom as a coffee and snack bar.


To do this, I cleaned it up and refinished it with Annie Sloan Chalk Paint (old white paint and clear wax) that I had from a previous project. I like ASCP because 1) no sanding is required and 2) it is a great paint to use for distressed pieces of furniture.

I applied two coats of ASCP with my ASCP brush, one coat of ASCP wax with an old rag, and then I sanded the edges to make it look a little distressed.


I finished the piece with new glass knobs and decoupaged the doors with scrapbook paper and Mod Podge.


Lastly, I had to give my upcycled piece of furniture some purpose by making it a coffee bar for our guests.  I bought a place mat for a few dollars at Old Time Pottery and put it underneath a small coffee pot and coffee mug stand from my first apartment.  Then I went to Goodwill on the first Saturday of the month when everything is half off and purchased a set of coffee mugs for $.50 each. Inside the doors, I store extra sheets for the guestroom bed.  On the shelf, I keep snacks, coffee, teas, and bottled water in a tray I purchased from Home Goods. 


My husband likes to tease me about this project.  He reminds me that we don’t run a bed and breakfast.  But I do like having coffee and teas for guests in their own room when they come to visit.....and by guests, I mean family who come to visit once or twice of year and my mom who comes to visit me every few months.  My mom looks forward to the chocolates and biscotti in her room when she comes to visit, so I think that this little coffee bar is a nice hospitable touch in the guestroom.  


What can I say, I just want my house to feel like home when they walk into my house.  Any little project that helps make that happen is a successful project in my eyes.


Read More
Posted in annie sloans chalk paint, decoupage, DIY, furniture, projects, upcycled | No comments

Tuesday, 22 July 2014

DIY Vintage Insect Wall Art

Posted on 04:11 by clark


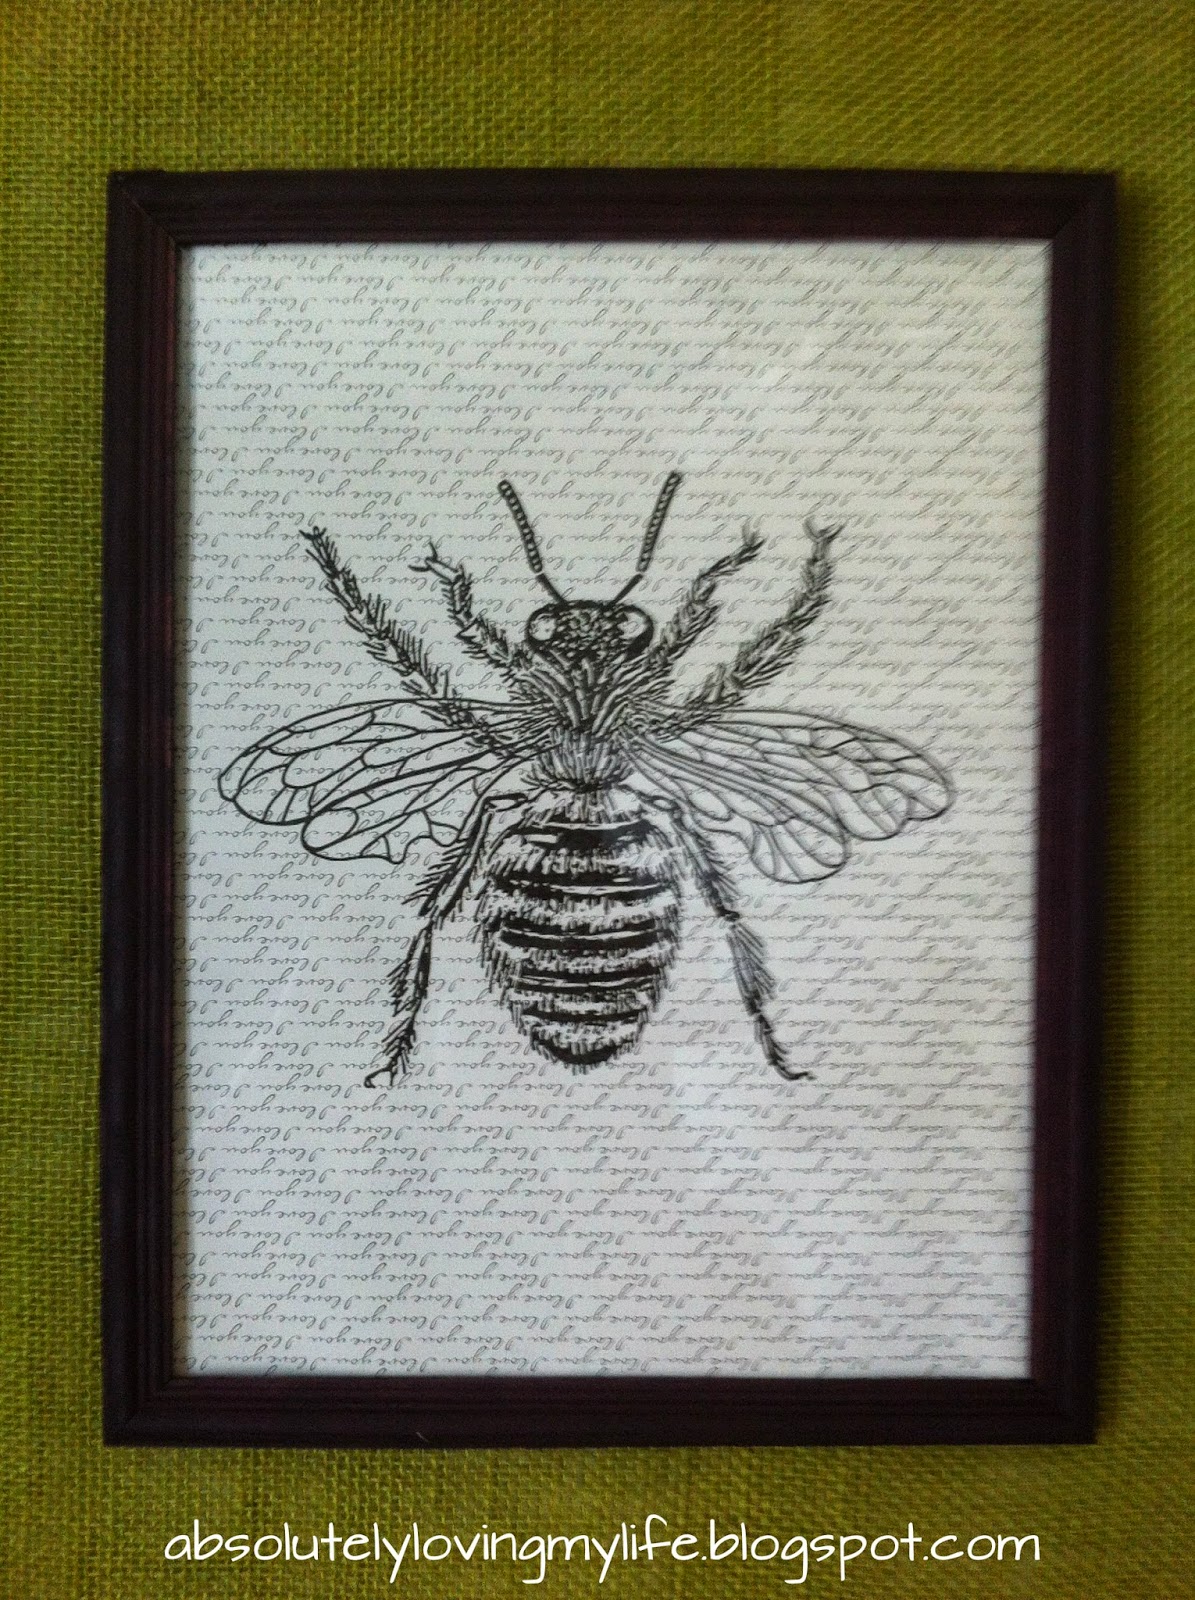
Today I want to share a fun project that I made for our guestroom.  I really liked the look of vintage insect art. I know it sounds kind of unusual, using images of insects as art.  But when it looks vintage, it kind of makes it feel like nature is being used as art in a beautiful way.


This projects re-purposes two large Goodwill frames, and it uses a fun new purpose for two small Dollar Tree frames.


First, I found images that I liked on clip art and enlarged them to fit my frames.


Then, I printed them on regular computer paper to see how they printed.


Once I was happy with the result, I cut vintage scripted scrapbook paper down to size and printed the images onto the scrapbook paper.


Using two light-weight frames from the Dollar Tree, I framed the images and set them aside.


I then moved on to two larger pieces of framed art I found from Goodwill.  They were originally Target pieces, marked $10 each at Goodwill.  I purchased them on the first Saturday of the month from Goodwill making them $5 each.  While they were great winter pieces of framed snowflakes, I had no place to put them as they were, so I re-purposed them.  For this project, I was only using them frame.  I disassembled everything, being careful to salvage the other pieces for future projects.


Once I had two empty frames, I measured enough green burlap for each frame.  Burlap is an inexpensive fabric, usually only a few bucks a yard. I purchased mine at JoAnn Fabrics.


To cut burlap straight, pull a piece of the twine……


….and keep pulling until the entire piece is pulled out of the fabric…..


….leaving a visible straight line to see where to cut with a good pair of sewing scissors.


Once I had two perfectly measured pieces of cut burlap, I hot glued the pieces of burlap to the back of my frame.  Note that I did not use the original backing of the frame for this project.  I only used the frame.  The burlap is visible on both the front and back of this project.


I then measured and securely hung the frames to my wall.


And lastly, I put a nail through my burlap in the middle of both frames….


….and hung my two light-weight framed pieces of vintage insect art made out of the Dollar Tree Frames, creating a frame within a frame:)


Then I stepped back and admired my work.


This project cost me less than $20 for both finished pieces, and I’m very happy with the end results.  They make lovely pieces of art in the guestroom and it was a fun, creative re-purpose of frames.

Read More
Posted in DIY, projects, upcycled, wall decor | No comments

Monday, 21 July 2014

DIY "book" Shelves

Posted on 09:33 by clark

I've spent the past month catching up on blog posts that I never got around to writing when I was pregnant.  The past two weeks, I posted all of our nursery projects that we completed in our home last fall.  This week, I want to post a few projects that I completed in our guest room last summer.   They just never made it to the blog once pregnancy and babies took over my life.

In the past, I have posted a few projects for our guestroom.  The following received quite a bit of blog and pinterest traffic:  Painting Horizontal Stripes, DIY Beaded Lamp Shades, Toilet Paper Tubes turned into Art and More Toilet Paper Tubed Art.  Like I had mentioned in those posts, when decorating the guestroom I wanted to keep the cost to a minimum, because I didn't know how long it would before the guestroom was turned into a second kid’s room.  Between the borrowed bed from my sister-in-law, the bedding that we used in our room when we were first married, and numerous inexpensive and creative projects, I have been able to have a guestroom that is inviting and well, I’ll just say it…CHEAP.


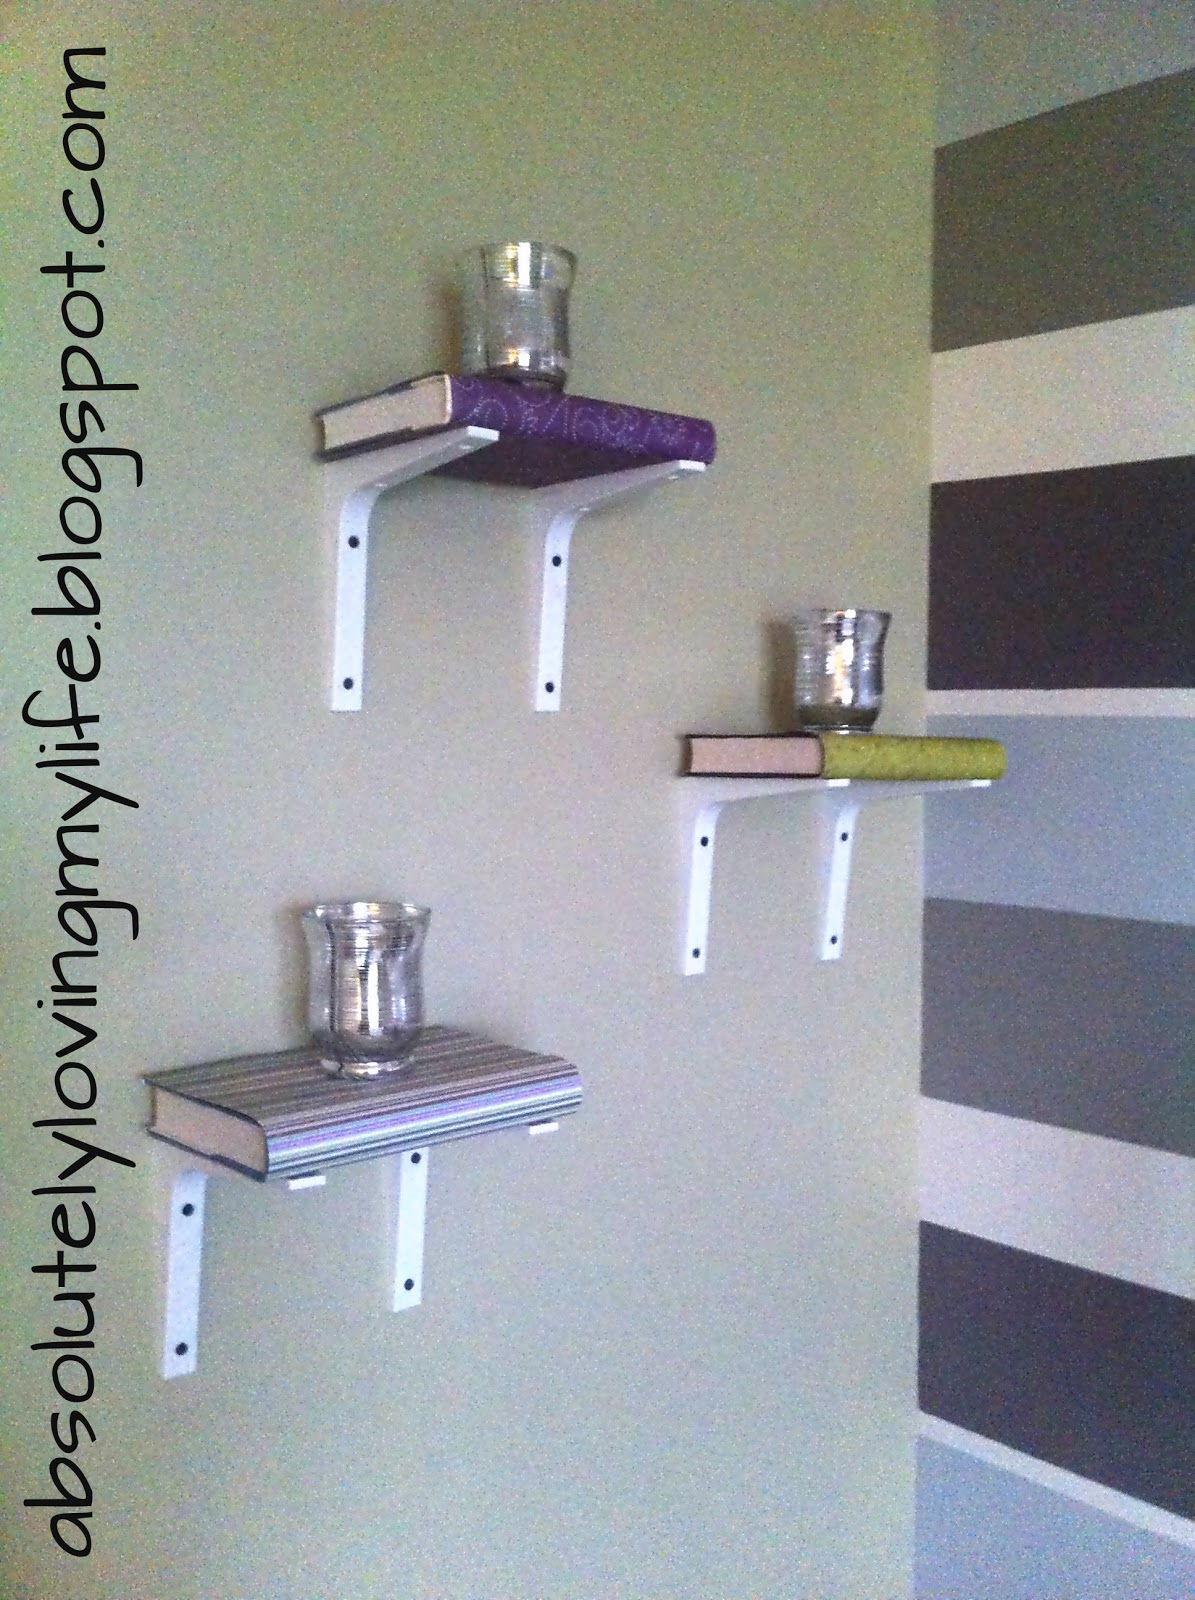
Today, I want to share a project that I think I originally saw on HGTV.   I just took my own spin on it to make it work for me.  DIY “BOOK” Shelves is today’s blog project.  Yes, these are literally book shelves, as in books are what the shelves are made of. This project cost me $15 to complete.


To start, I went to the Dollar Tree and picked three hard-cover books.  You can use books that you already have, but I was using these books for decoration not leisurely reading.


Next, I took three pieces of scrapbook paper that coordinated with the colors of the room, cut them down to size and made book covers.


Then, I measured and screwed six shelving brackets from Ikea ($1.99 each) into the wall.


Lastly, I placed the books on the brackets and had myself a great place to display three candle holders that someone had given me as a birthday gift.  And that's it!  That's how to make shelves from books!
Read More
Posted in bookshelf, DIY, projects, scrapbook paper | No comments

Saturday, 19 July 2014

Little Boy Bathroom

Posted on 18:35 by clark

Today I’m finishing up my blog series about our twin nursery.  I thought I’d finish things up with a post about the bathroom off the boys’ room. 

First, we took down the light fixture and the mirror, filled the necessary holes and painted the bathroom “hearts of palm” by Sherwin Williams.

Then, we replaced the light fixtrure with an updated fixture that I found from Goodwill.  I kid you not, it was only marked $10. And even better is that I only paid $5 for it, because I purchased it on the first Saturday of the month when everything in the store is half off.

Next, we replaced the mirror with a $30 oval mirror found at Kirkland’s during their mirror sale.  I really think the updated fixture and mirror give the bathroom a lot of character.

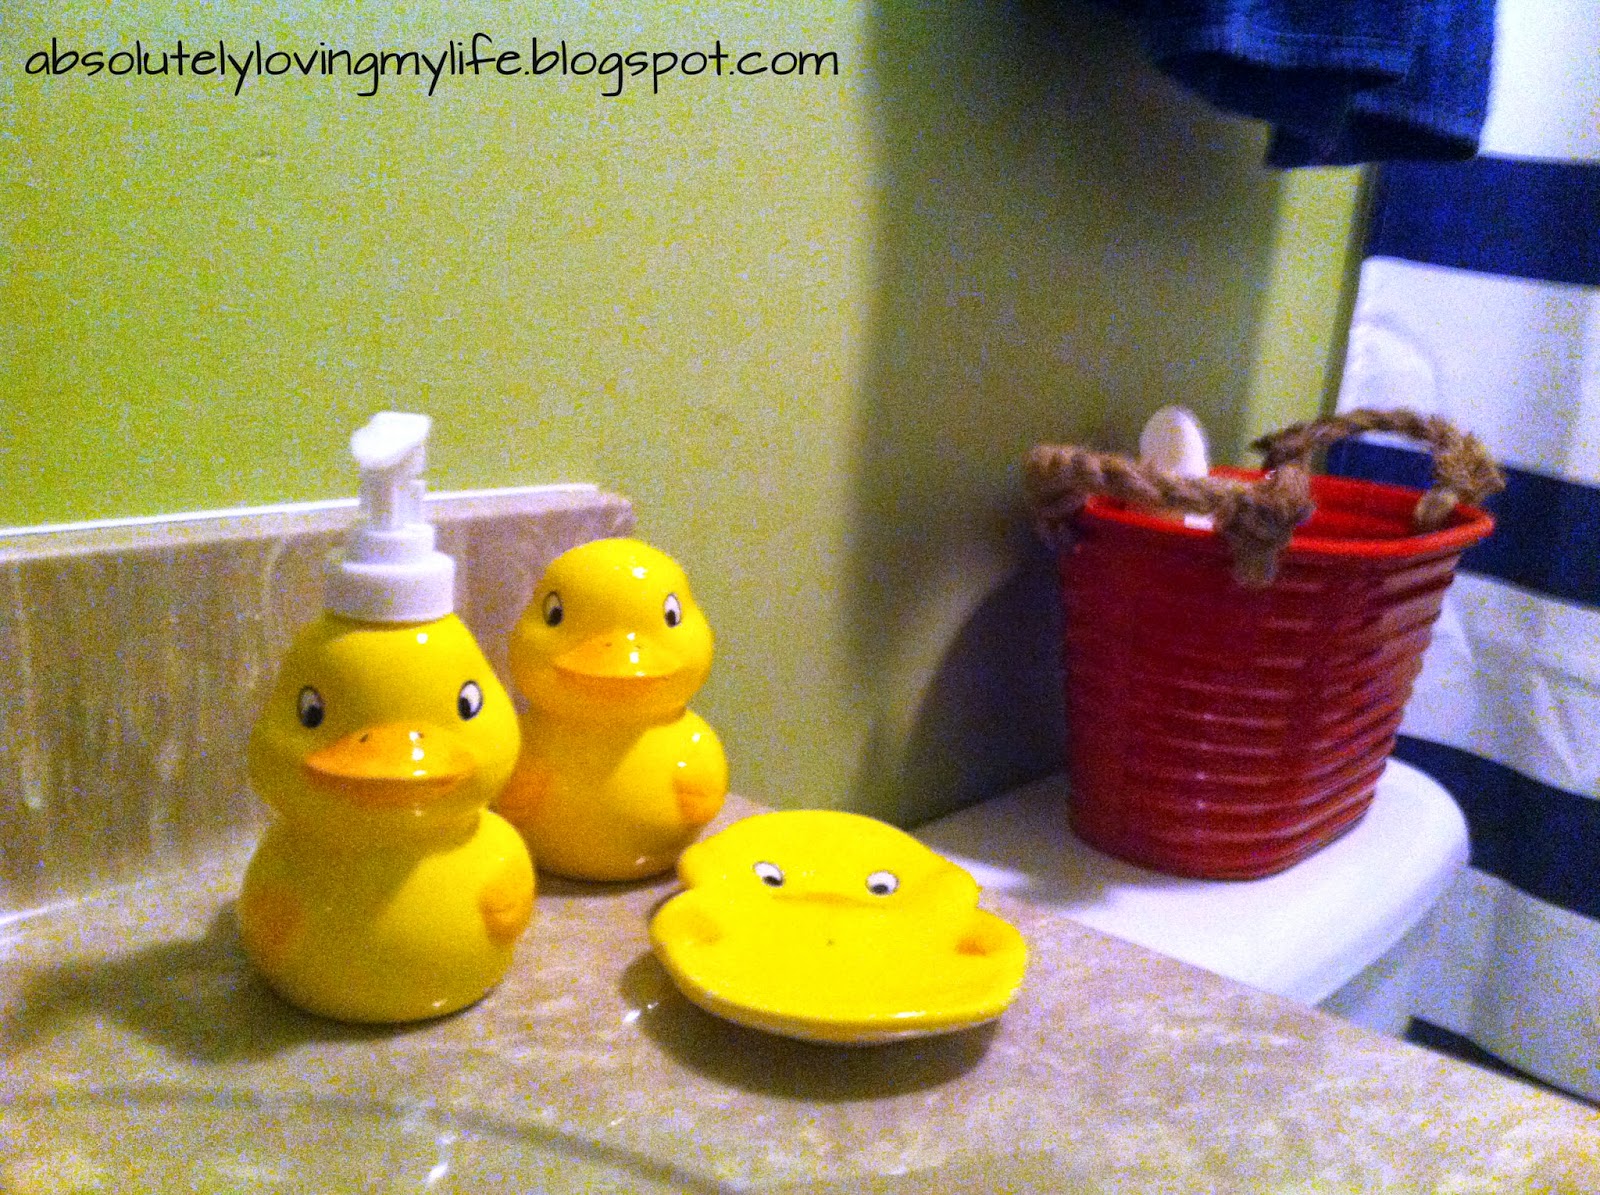
Lastly, I spent less than $50 to decorate the bathroom by adding a shower curtain from Target, rugs from Wal-mart, little ducky soap dishes from the Dollar Tree, a red storage bin from Hobby Lobby, and a fun life boat décor for the door.

And that’s it.  I hope you enjoyed this blog series.  Check out my project gallery page to find all of the nursery projects and more!


Read More
Posted in baby, bathroom, DIY, nursery, projects, twins | No comments

Friday, 18 July 2014

Upcycled Nursery Dresser

Posted on 05:15 by clark


AFTER

BEFORE


Like I said in yesterday’s post, I’m a big fan of finding old pieces of furniture at yard sales and thrift shops, and then refinishing them for a new purpose in my home.  Yesterday, I shared how I refinished a $25 Goodwill dresser and re-purposed it for a changing station.  Today, I want to share with you the other dresser in the nursery. 

This dresser was also a Goodwill find.  I actually purchased it a few years ago for $20 and was utilizing it in the guest bedroom.  I moved it to the nursery, because it wasn't really getting used in the guest room.


I refinished this piece the exact same way that I refinished the other dresser…..


1)    I started by cleaning the dresser with TSP cleaner. It can be found at most hardware stores.  I buy mine in a powder and mix it in a spray bottle. 
2)    Using a foam roller I primed the dresser with Zinsser Cover Stain primer.  It took two coats to fully cover this piece of furniture.  I keep this paint on hand for when I find furniture to refinish.
3)    I had leftover navy blue paint (“seaworthy” by Sherwin Williams) from the accent wall in the nursery, and applied two coats of paint to the dresser for full coverage.
4)    I updated the hardware with nickel knobs from Lowes.  The hardware cost just about as much as the dresser, making this dresser cost about $50 when it was all said and done.
5)    Tip:  Always take out the drawers when painting and let paint dry completely before applying a new coat.    


The only problem that I ran into with this dresser is that it had a laminate finish.  This was the first piece I had ever tried to refinish with laminate.  I found it more difficult for the paint to stick to the laminate, but after taking my time and making sure each coat was dry before applying another coat, I finally finished this piece.  I will say, that unlike other pieces that I have done, the paint is more likely to peal off on laminate.  I haven’t had any problems so far, but my kids are still babies.  It will probably get more wear and tear as the boys get bigger.


Read More
Posted in baby, DIY, dresser, furniture, nursery, paint, projects, twins | No comments

Thursday, 17 July 2014

Re-purposed Goodwill Dresser - Nursery Changing Table

Posted on 03:33 by clark


AFTER

BEFORE

I’m a big fan of finding old pieces of furniture at yard sales and thrift shops, and then refinishing them for a new purpose in my home.  Take a look at my project page, and you’ll see that I accumulated a lot of the furniture in my home by doing just that.

Both dressers in the nursery were Goodwill finds.  Today, I want to share a dresser that I purchased from Goodwill for $25.  The dresser is solid wood, and it serves as a duel purpose in the nursery.  It not only stores the babies’ clothes, it also works as their changing table.  I bought a changing pad from Once Upon a Child and found a changing pad cover that I liked from Burlington Coat Factory.  I added a lamp from Goodwill and a cute bin from Home Goods, and I had myself an inexpensive changing station.   And the best part is that when I no longer need a changing table, I can still use the dresser in a little boys room for years to come.


The original dresser was in decent shape, but I really wanted a navy blue dresser.  And because I only spent $25 on this piece, I had no problem feeling bad for giving a perfectly fine dresser a new look.

I refinished this piece the way I refinish most pieces with no sanding required……

1)    I started by cleaning the dresser with TSP cleaner. It can be found at most hardware stores.  I buy mine in a powder and mix it in a spray bottle. 
2)    Using a foam roller I primed the dresser with Zinsser Cover Stain primer.  It took two coats to fully cover this piece of furniture.  I keep this paint on hand for when I find furniture to refinish.
3)    I had leftover navy blue paint (“seaworthy” by Sherwin Williams) from the accent wall in the nursery, and applied two coats of paint to the dresser for full coverage.
4)    I updated the hardware with nickel knobs from Lowes.  The hardware cost just about as much as the dresser, making this dresser cost about $50 when it was all said and done.
5)    Tip:  Always take out the drawers when painting and let paint dry completely before applying a new coat.  The primer and the sponge roller are key to getting a streak free finish without needing to sand, so don't skip those steps.  


Read More
Posted in baby, DIY, dresser, furniture, nursery, paint, projects, twins | No comments
Older Posts Home
Subscribe to: Posts (Atom)

Popular Posts

  • DIY No Sew Crib Bumper
    Today I want to share with you how I made no-sew crib bumpers for our twin boy nursery.   Before I begin, I know that bumpers are controvers...
  • The First Saturday of the Month at Goodwill
                      It’s the first Saturday of the month, and do you know what that means?   Well, if you ever shop at Goodwill,you know that ...
  • Yard Sale Lamp Revamp
    Remember my $5 yard sale lamp from Friday's post ?  Well, check out what a little bit of trim and and a hot glue gun can do! I found t...
  • My Real Life Love Story Part 4 - Planning the Wedding
    You can read previous posts abot my love story at the following links :  Introduction  ;   Part 1 – How We Met ;   Part 2 – Getting To Kno...
  • Annie Sloan Chalk Paint Furniture Redo - from dresser to TV stand
    I spent much of last fall furnishing our loft.   Because this is a large space, I wanted to utilize the area for several different purposes...
  • DIY "Twins" Banner
    Banners are all the rage as kid’s décor these days.  They are often used in parties, photo props or as room décor.  They are also incredibly...
  • New England Road Trip - Boston, MA (Days 2-3)
    Anytime we take a road trip, I always plan a combination of quiet sleepy towns and the hustle and bustle of the city.   The reason for that ...
  • My Story of Surviving Twins with Colic - Ten things I'd say to the mom of a colicky baby......
    1) I understand completely, and I feel for you..... Bringing home a newborn can be exhausting for anyone.  Adjusting to sleep deprivation an...
  • Twin Boy Nursery on a Budget
      Today, I want to share with you our twin boy nursery. Over the next two weeks, I will be sharing individual projects that I completed for...
  • Food, Family, Fellowship....Labor Day Weekend
           I can't believe it's already Labor Day weekend!  Where did the summer go?  One of the best things about Labor Day is spending...

Categories

  • 29
  • adoption
  • annie sloans chalk paint
  • anniversary
  • apple orchard
  • autumn
  • awards
  • babies
  • baby
  • banner
  • barstool
  • bathroom
  • beads
  • birth
  • birthday
  • blogging
  • book
  • book pages
  • books
  • bookshelf
  • Boston
  • Brown County
  • buttons
  • California Road Trip
  • candles
  • canisters
  • chair
  • chalk board paint
  • chalk paint
  • chalkboard paint
  • chevron
  • christmas
  • cleaners
  • coffee beans
  • Connecticut
  • conner prairie
  • covered bridge festival
  • craft
  • crafts
  • craigslist
  • crib bumper
  • crib skirt
  • curtains
  • cushion
  • date night
  • day trip
  • decoupage
  • desk
  • DIY
  • Dollar Store
  • door knobs
  • dresser
  • elections
  • fabric
  • fall
  • family
  • featured
  • felt
  • floors
  • flowers
  • food
  • front door
  • front porch
  • furniture
  • giveaways
  • going yellow
  • goo gone
  • goodwill good deal
  • great finds
  • green
  • Halloween
  • headless horseman
  • hiking
  • holidays
  • house
  • husband
  • infertility
  • infertily
  • IUI
  • journal
  • Kennebunkport
  • Kent
  • kitchen
  • lamp
  • lamp shade
  • lamps
  • landscaping
  • letters to my babies
  • Maine
  • marriage
  • Martha's Vineyard
  • Massachussetts
  • maternity pictures
  • Memorial Day
  • mod podge
  • monogram
  • movie
  • movies
  • my job
  • my mom
  • napkin
  • Nashville
  • New England Road Trip
  • new year
  • no-sew
  • nursery
  • one month old
  • organization
  • outdoors
  • paint
  • pantry
  • parenting
  • patriotic
  • photos
  • picnic
  • pillow
  • pregnancy
  • project
  • projects
  • pumpkin patch
  • pumpkins
  • random
  • reading
  • red
  • review
  • rope
  • Safe Haven
  • San Francisco
  • scrapbook paper
  • snow
  • spray paint
  • spring
  • stripes
  • summer
  • table
  • Tennessee
  • three months old
  • tiles
  • TP tubes
  • travel
  • Turkey Run State Park
  • turning 30
  • twins
  • two months old
  • upcycled
  • vacation
  • Valentine
  • vote
  • wall decor
  • wall treatment
  • weekend getaway
  • winter
  • wreath
  • yard sale find

Blog Archive

  • ▼  2014 (36)
    • ▼  July (21)
      • My Story of Surviving Twins with Colic - Ten thing...
      • Parenting Twins - The First Year (Month 4)
      • DIY Flower Lamp Shade
      • Upcycled Coffee Bar
      • DIY Vintage Insect Wall Art
      • DIY "book" Shelves
      • Little Boy Bathroom
      • Upcycled Nursery Dresser
      • Re-purposed Goodwill Dresser - Nursery Changing Table
      • Spray Painted Picture Frames & Photos as Wall Art
      • DIY Monogram Nursery Wall Art
      • DIY "Twins" Banner
      • Easy DIY Board and Batten for the Nursery
      • DIY No Sew Kid's Bench Cushion
      • DIY No Sew Crib Bumper
      • DIY No-Sew Chevron Curtains
      • DIY No-Sew Chevron Crib Skirt
      • Twin Boy Nursery on a Budget
      • New England Road Trip - Martha's Vineyard (Day4-6)
      • New England Road Trip - Kennebunkport, ME (Days 3-4)
      • New England Road Trip - Boston, MA (Days 2-3)
    • ►  June (3)
    • ►  May (1)
    • ►  April (4)
    • ►  March (2)
    • ►  February (4)
    • ►  January (1)
  • ►  2013 (45)
    • ►  December (3)
    • ►  November (2)
    • ►  October (5)
    • ►  September (1)
    • ►  August (3)
    • ►  July (1)
    • ►  May (3)
    • ►  April (13)
    • ►  March (7)
    • ►  February (6)
    • ►  January (1)
  • ►  2012 (89)
    • ►  November (3)
    • ►  October (7)
    • ►  September (3)
    • ►  August (12)
    • ►  July (9)
    • ►  June (7)
    • ►  May (7)
    • ►  April (11)
    • ►  March (11)
    • ►  February (10)
    • ►  January (9)
  • ►  2011 (165)
    • ►  December (18)
    • ►  November (11)
    • ►  October (19)
    • ►  September (12)
    • ►  August (20)
    • ►  July (19)
    • ►  June (19)
    • ►  May (17)
    • ►  April (12)
    • ►  March (10)
    • ►  February (8)
Powered by Blogger.

About Me

clark
View my complete profile